Beyond the Visible
Images with "Infrared" Film

For many years now, I have loved the “out of this world” effect that can be achieved with “infrared” (IR) films. Despite having been shooting film for over four decades, I never took the opportunity to try out either Kodak Aerochrome or Ektachrome EIR slide films. Now, I have no desire to sell off any body parts to afford a well expired roll that’s had dubious storage! Also, I’m not really a colour shooter, and I largely stopped using colour slide film, other than an occasional roll of Velvia 50, after the Cibachrome printing process was discontinued. However, monochrome IR film is another story.
My first introduction to black and white IR was when Maco, in Germany, used to produce Aura and IR 820c. Sadly, both are now discontinued themselves. These films had an extended red sensitivity into the near-IR part of the spectrum, up to a wavelength of around 850 nm. Currently available options, which are not strictly full IR films, do not extend as far, but can still create a great IR effect. So what do you need to shoot IR film?
A camera that has no internal IR sensors; these were often used in automatic loading and advance systems, and these may fog the film! I tend to stick with cameras with manual wind, manual exposure and no autofocus. I’d also be very wary of cameras with film windows too, although a piece of tape can avoid any issues, we’ll come back to that! Some also say to avoid plastic bodied cameras, but I don’t agree with that, as we shall see.
A camera that can make long exposures, a B (bulb) setting is sufficient.
Manual focus lenses can be an advantage, as they often have an IR focus mark (usually a red dot to the side of the infinity mark). This is because IR focuses at a different point than visible light. This is not absolutely essential, you can avoid issues by shooting at smaller apertures.
A camera which filters can be attached to.
A tripod, your exposures will be long with an R72 filter. Partial infrared effects can be shot handheld with a standard red filter (25A).
A cable release, or a camera with a self timer, either will do.
A very deep red, or better still, a 720 nm infrared filter. The Hoya R72 is probably the most common, but Cokin made square IR filters (89B) and Lee make an 87C. For current films, I don’t go beyond a 720 nm filter as you could exceed the film’s spectral sensitivity and get blank frames, or require very, very long exposures! A conventional red (25A) filter will give a partial effect, but use an R72, or equivalent, if you want the full IR look.
With any type of SLR camera, it’s best to compose, and then fit the filter, as they are very difficult to see through.
A light meter, either in-camera, external, or on your mobile ‘phone. Bear in mind that you can’t readily measure the IR levels. So you will meter normally for visible light and then manually adjust the exposure settings.
An IR, or extended red sensitivity film. The most common modern films are Rollei Infrared 400 and Ilford SFX 200. The Rollei extends to 750 nm (according to Rollei’s data sheet, but some say that it goes beyond this) whilst Ilford is slightly shorter at 740 nm. Alternatively, you can try Rollei Retro 400S, Rollei Superpan 200, Rollei Retro 80S, Adox HR-50 and, possibly Fomapan 200, for their extended red responses. Also note that all these films can be shot normally, without red or IR filtration, to give conventional images. My personal preference is Rollei Infrared as it is available in 35mm, 120 and 4”x5” formats (be warned, it has a very thin base!). It can also be used as a reversal film due to its clear PET base (I’ve not tried this!).
One additional tip - always load and unload your film in subdued light. If you should come across any old Maco films, IR films don’t age well and, with 35mm, you’ll need to keep the cassette in its case and load and unload the camera in a changing bag, or in complete darkness, as the light trap is not IR safe.
If you have all of the above, there are some other factors needed to get the best results:
A bright, sunny day, they do happen, even in the UK. Results are usually best a few hours either side of midday with sun directly on your subject. Avoid overcast conditions.
The effects work best with foliage in the scene, especially younger spring and early summer leaves. These will turn almost white in your images, as we’ll see.
Blue skies, with some white clouds, work really well as the sky can be almost black, leaving the clouds white.
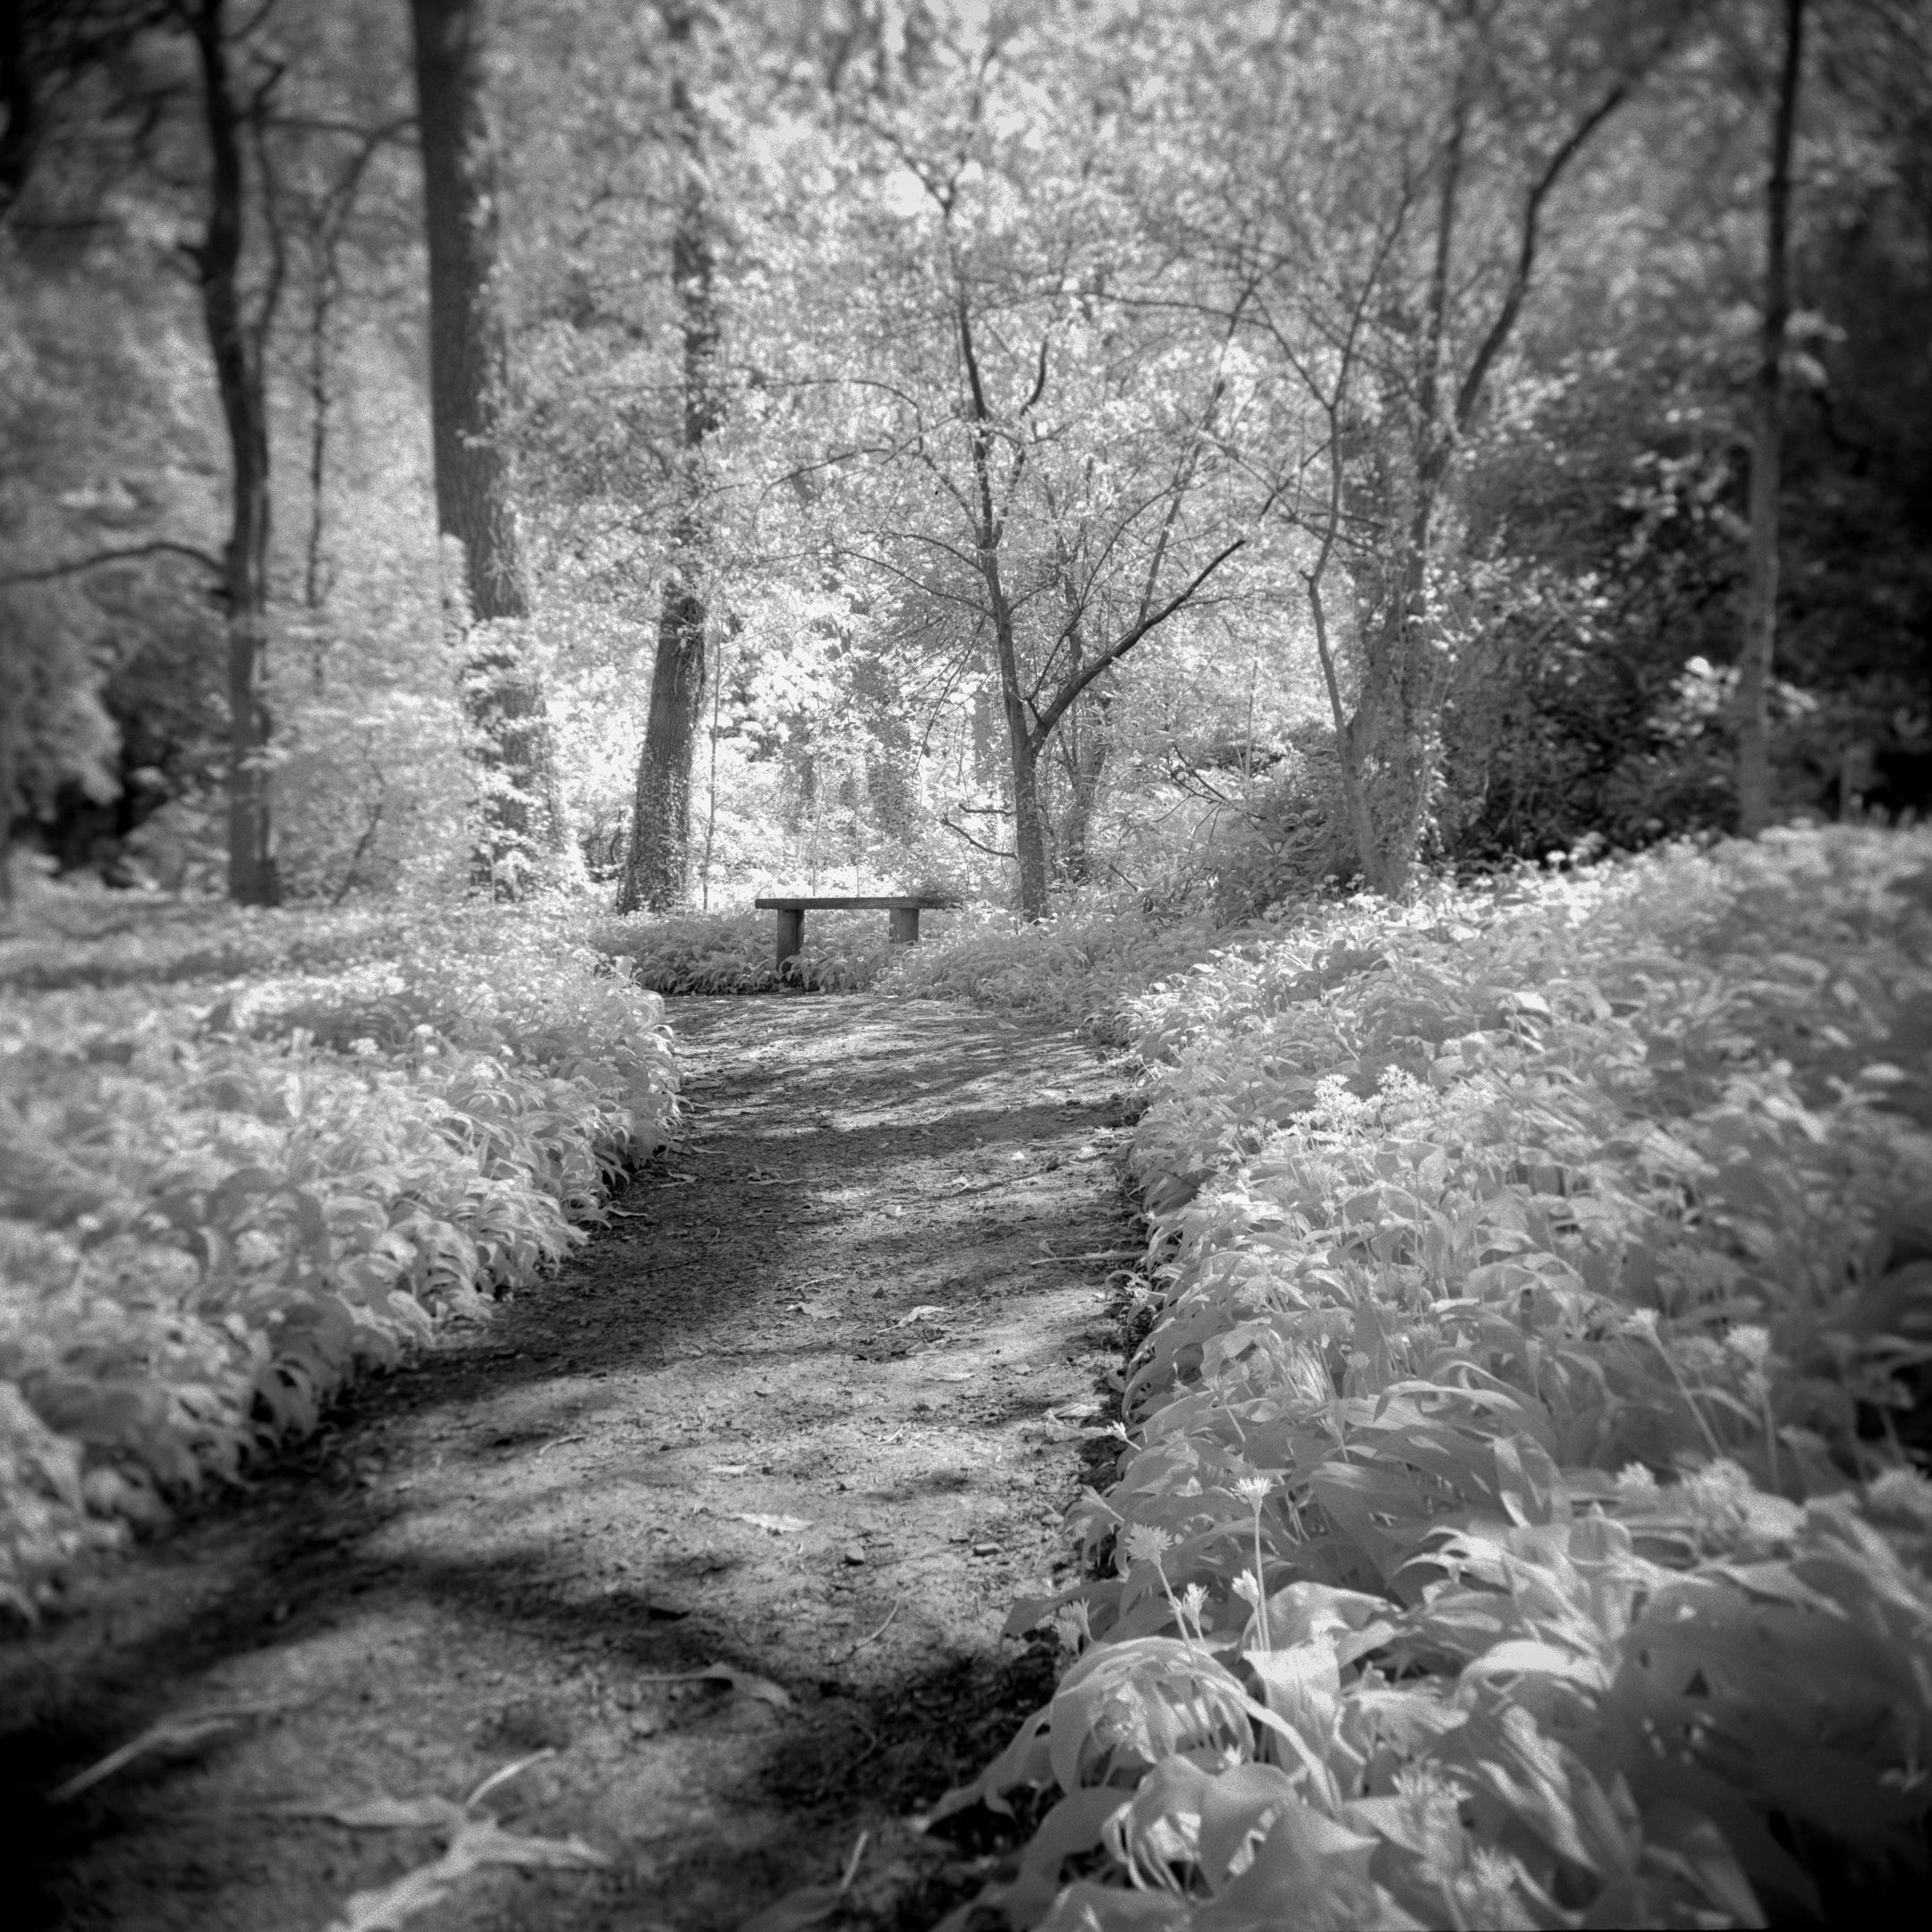
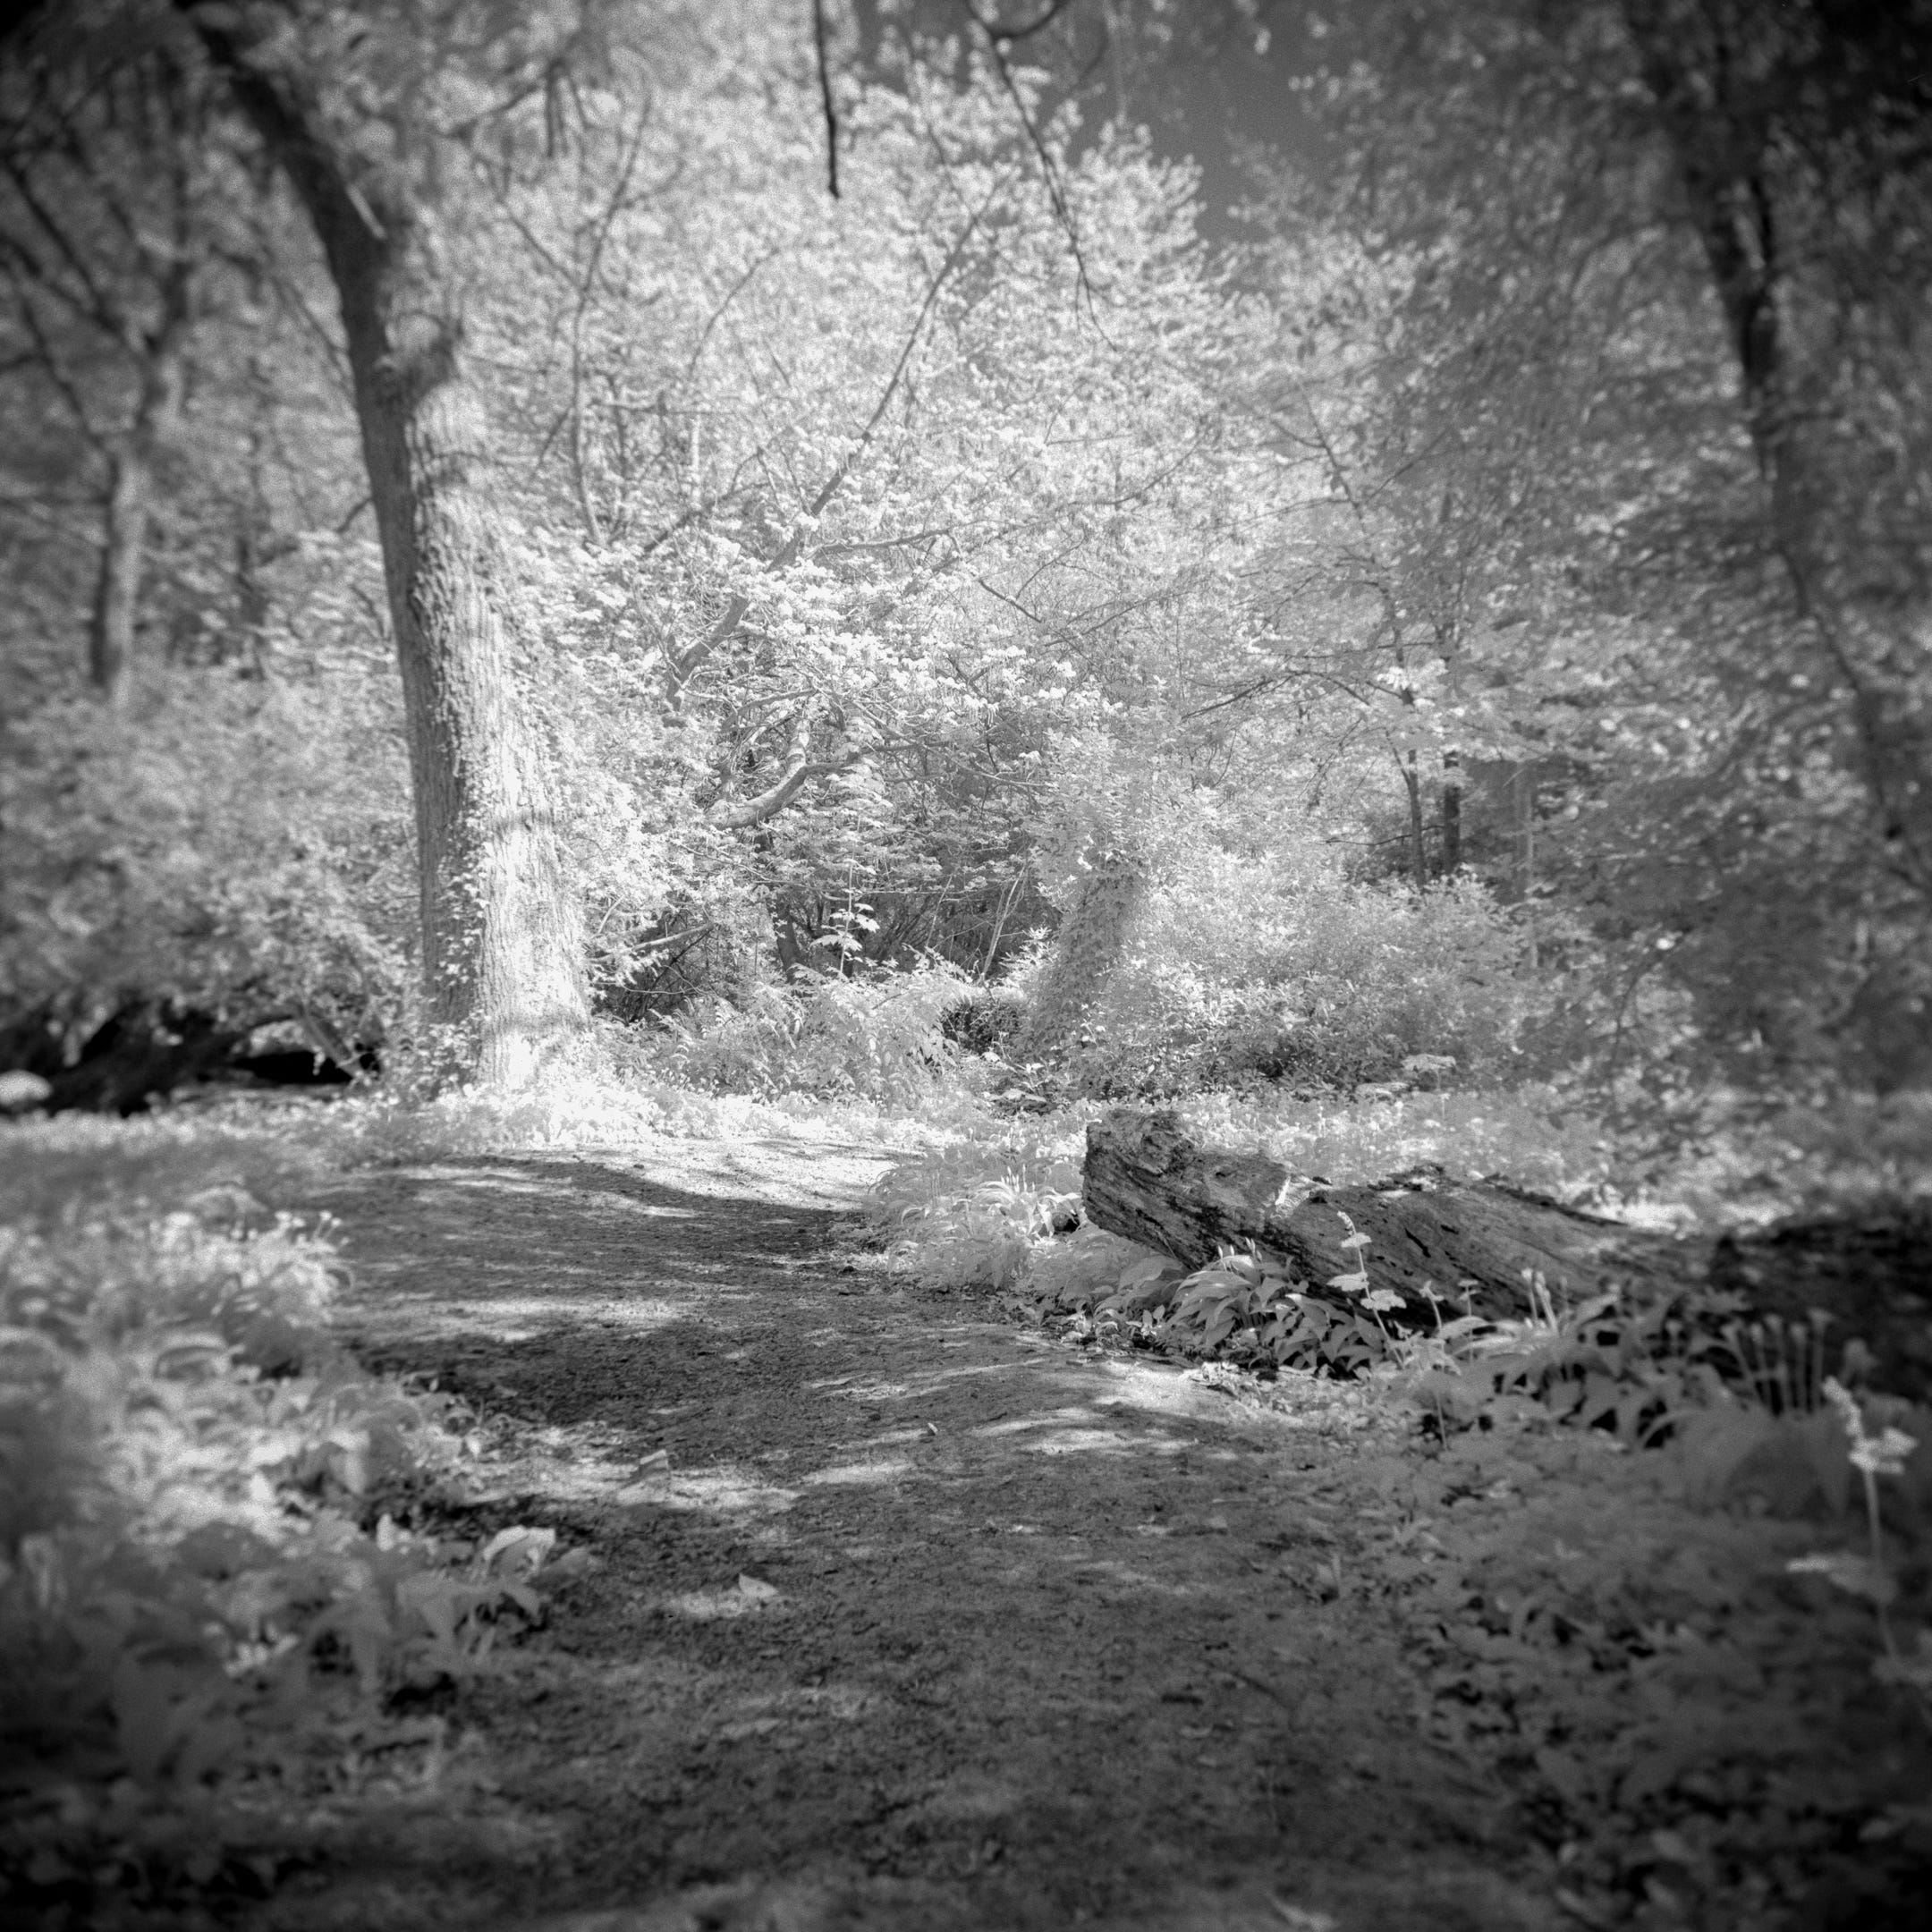
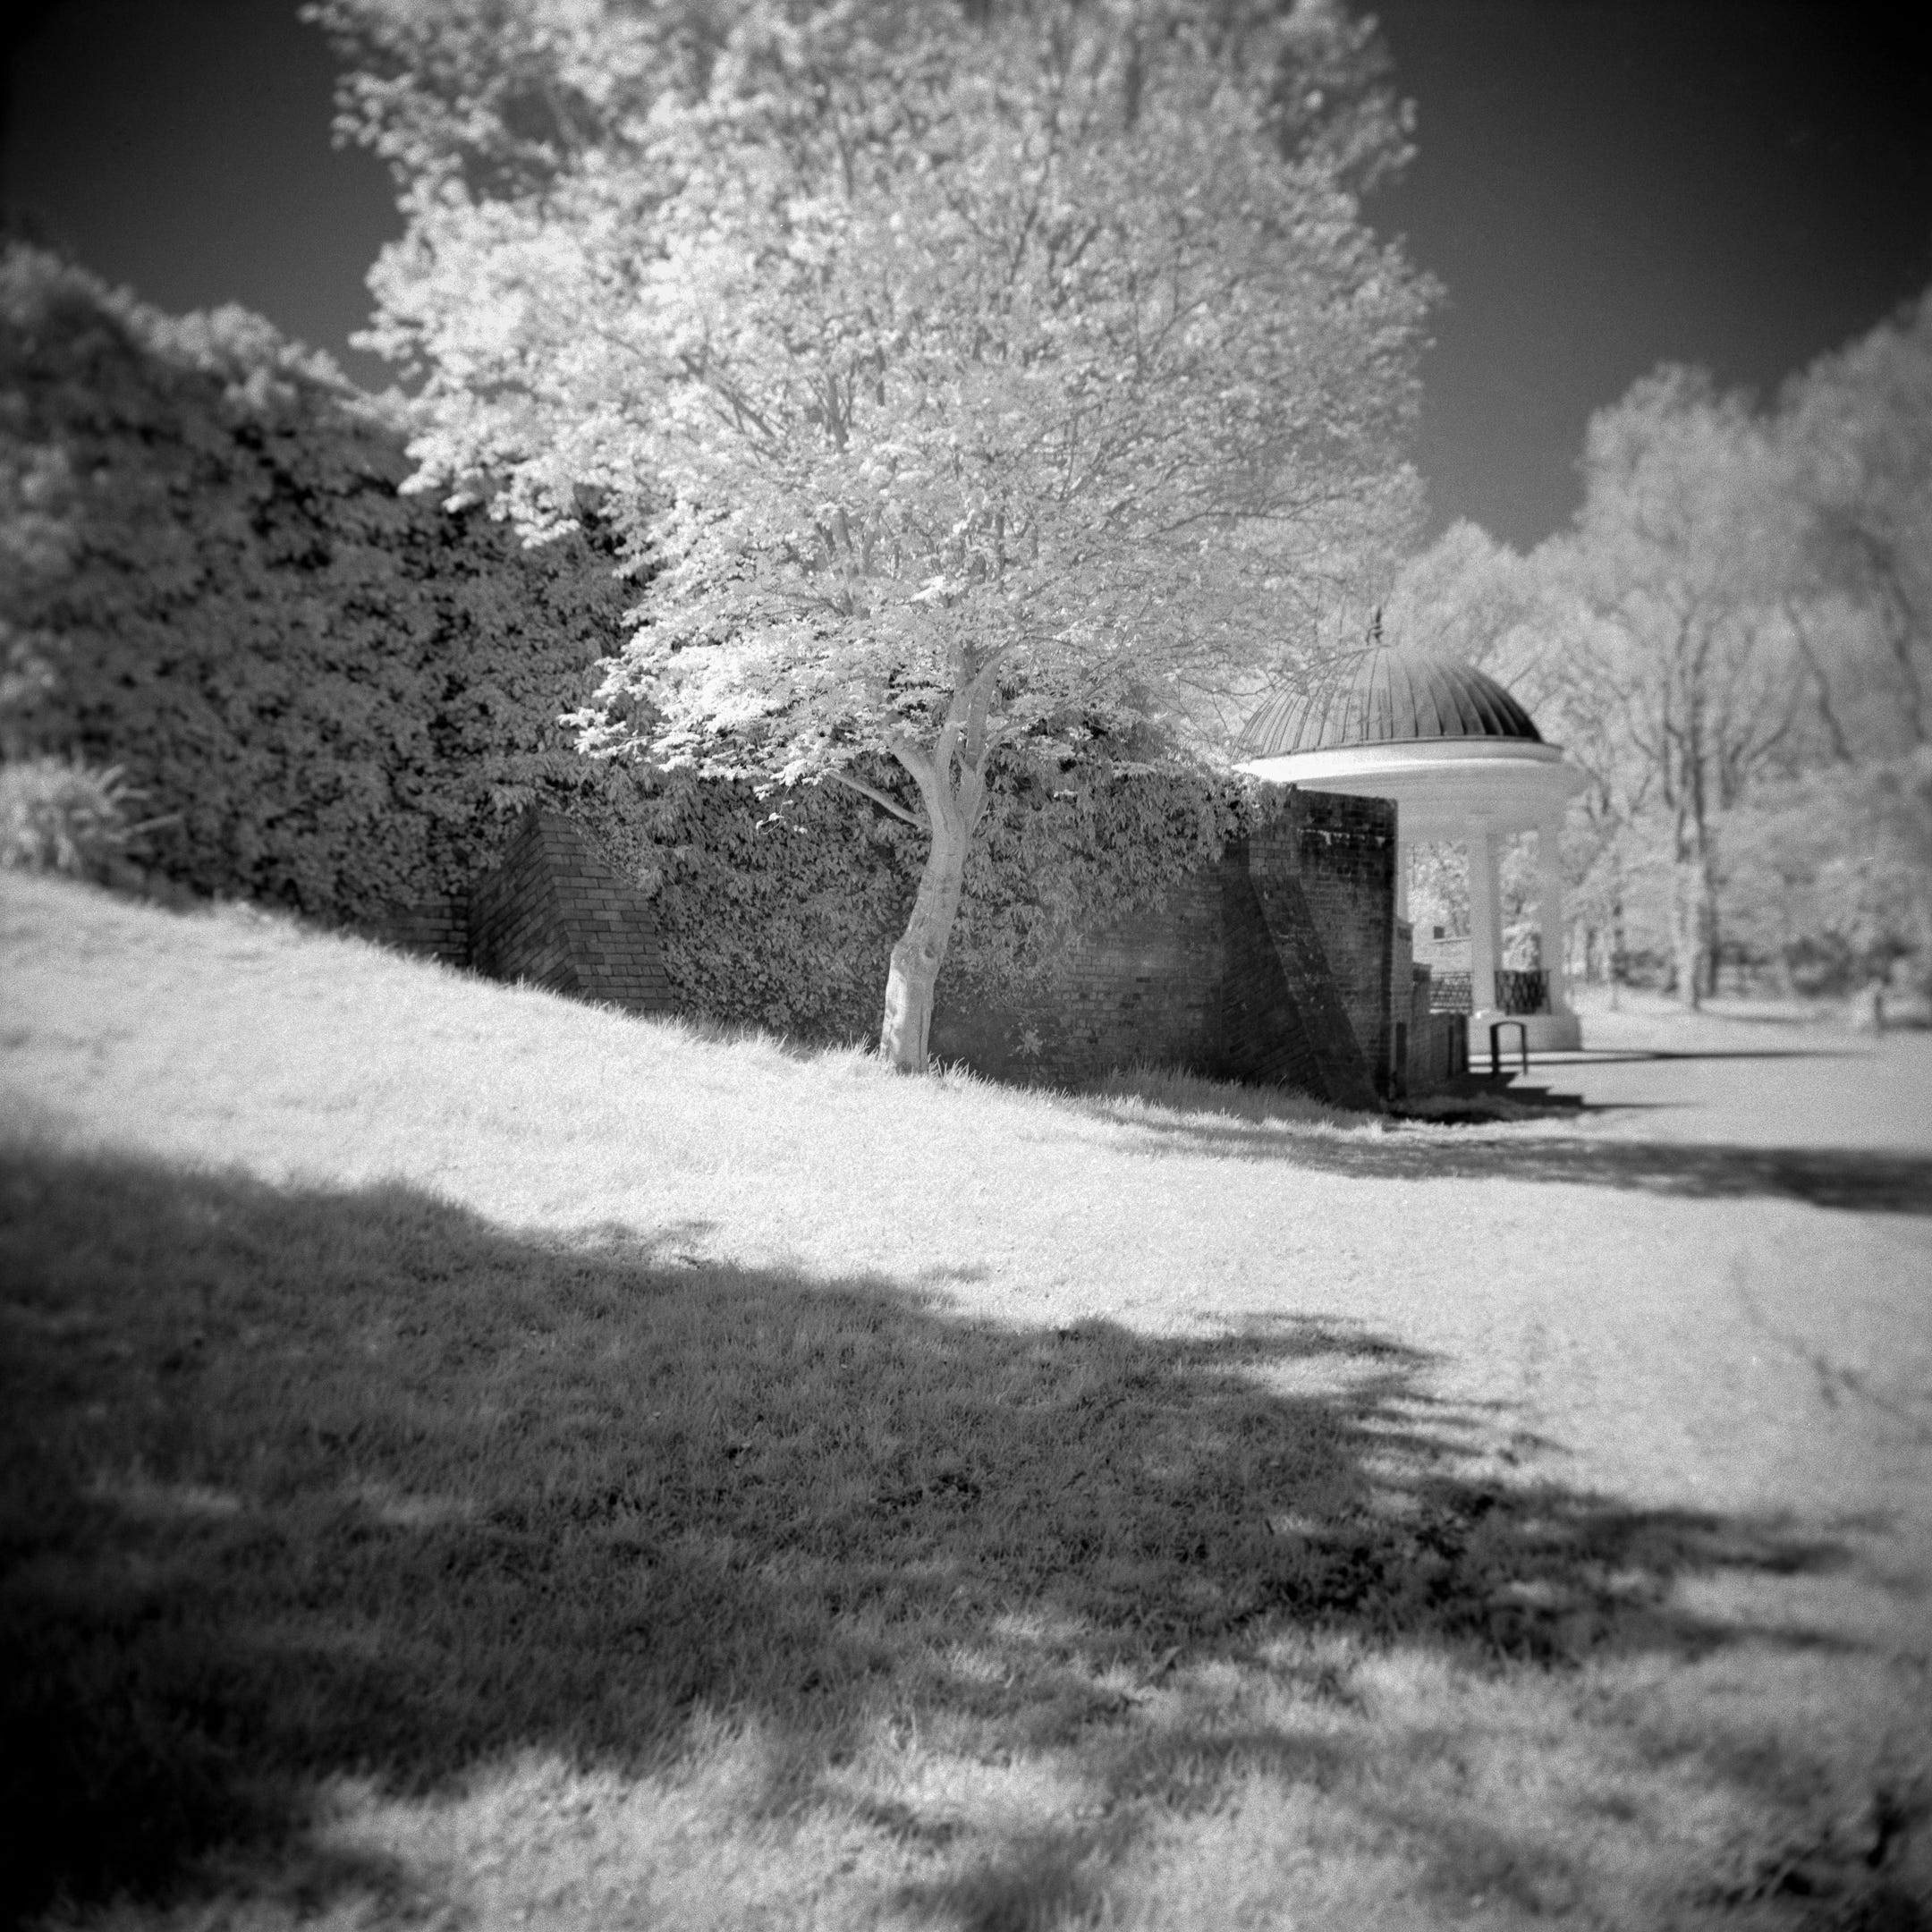
So to prove that just the basics can work, and you don’t need high-end gear for IR, I went out a couple of weeks ago with a roll of Rollei Infrared 400 loaded in my Holga 120N! I have a 3D printed cable release adapter for the camera and have “force fitted” a step up ring to attach a 52mm R72 filter. With IR film, I take even more care than normal with tape on this camera, around the back and over the red window. I set the switch underneath to B, attached the camera to a tripod and went for a walk in my local park, Stanley Park in Blackpool, Lancashire.
As far as metering was concerned, there is certain amount of guesswork with IR. I wouldn’t recommend trying to meter through an R72 filter. I generally take a meter reading of the scene with a camera, handheld meter or phone at the native ISO 400 and then increase the exposure by around 5 or 6 stops. Alternatively, take a reading at ISO 6 or 12 on your meter and use this exposure setting. It’s best to err on the side of overexposure, or you could bracket shots. With the Holga, I metered with my phone at ISO 6 and most of my exposures came out at around 1 second at the sunny aperture (allegedly f11). Because I was using a roll of 120, and a Holga, I didn’t bother with bracketing.
I developed the roll in Rodinal 1+50 for 15 minutes at 20°C. I felt that this was a good compromise as Rodinal’s tendency to show grain can be quite pleasing with IR and the higher dilution gives good acutance as well. A Holga lens needs all the help it can get with sharpness! Rollei gives times for a range of other developers including Rollei developers, ID11/D76, Kodak HC110 and XTOL and more. Anyway, on to some results:


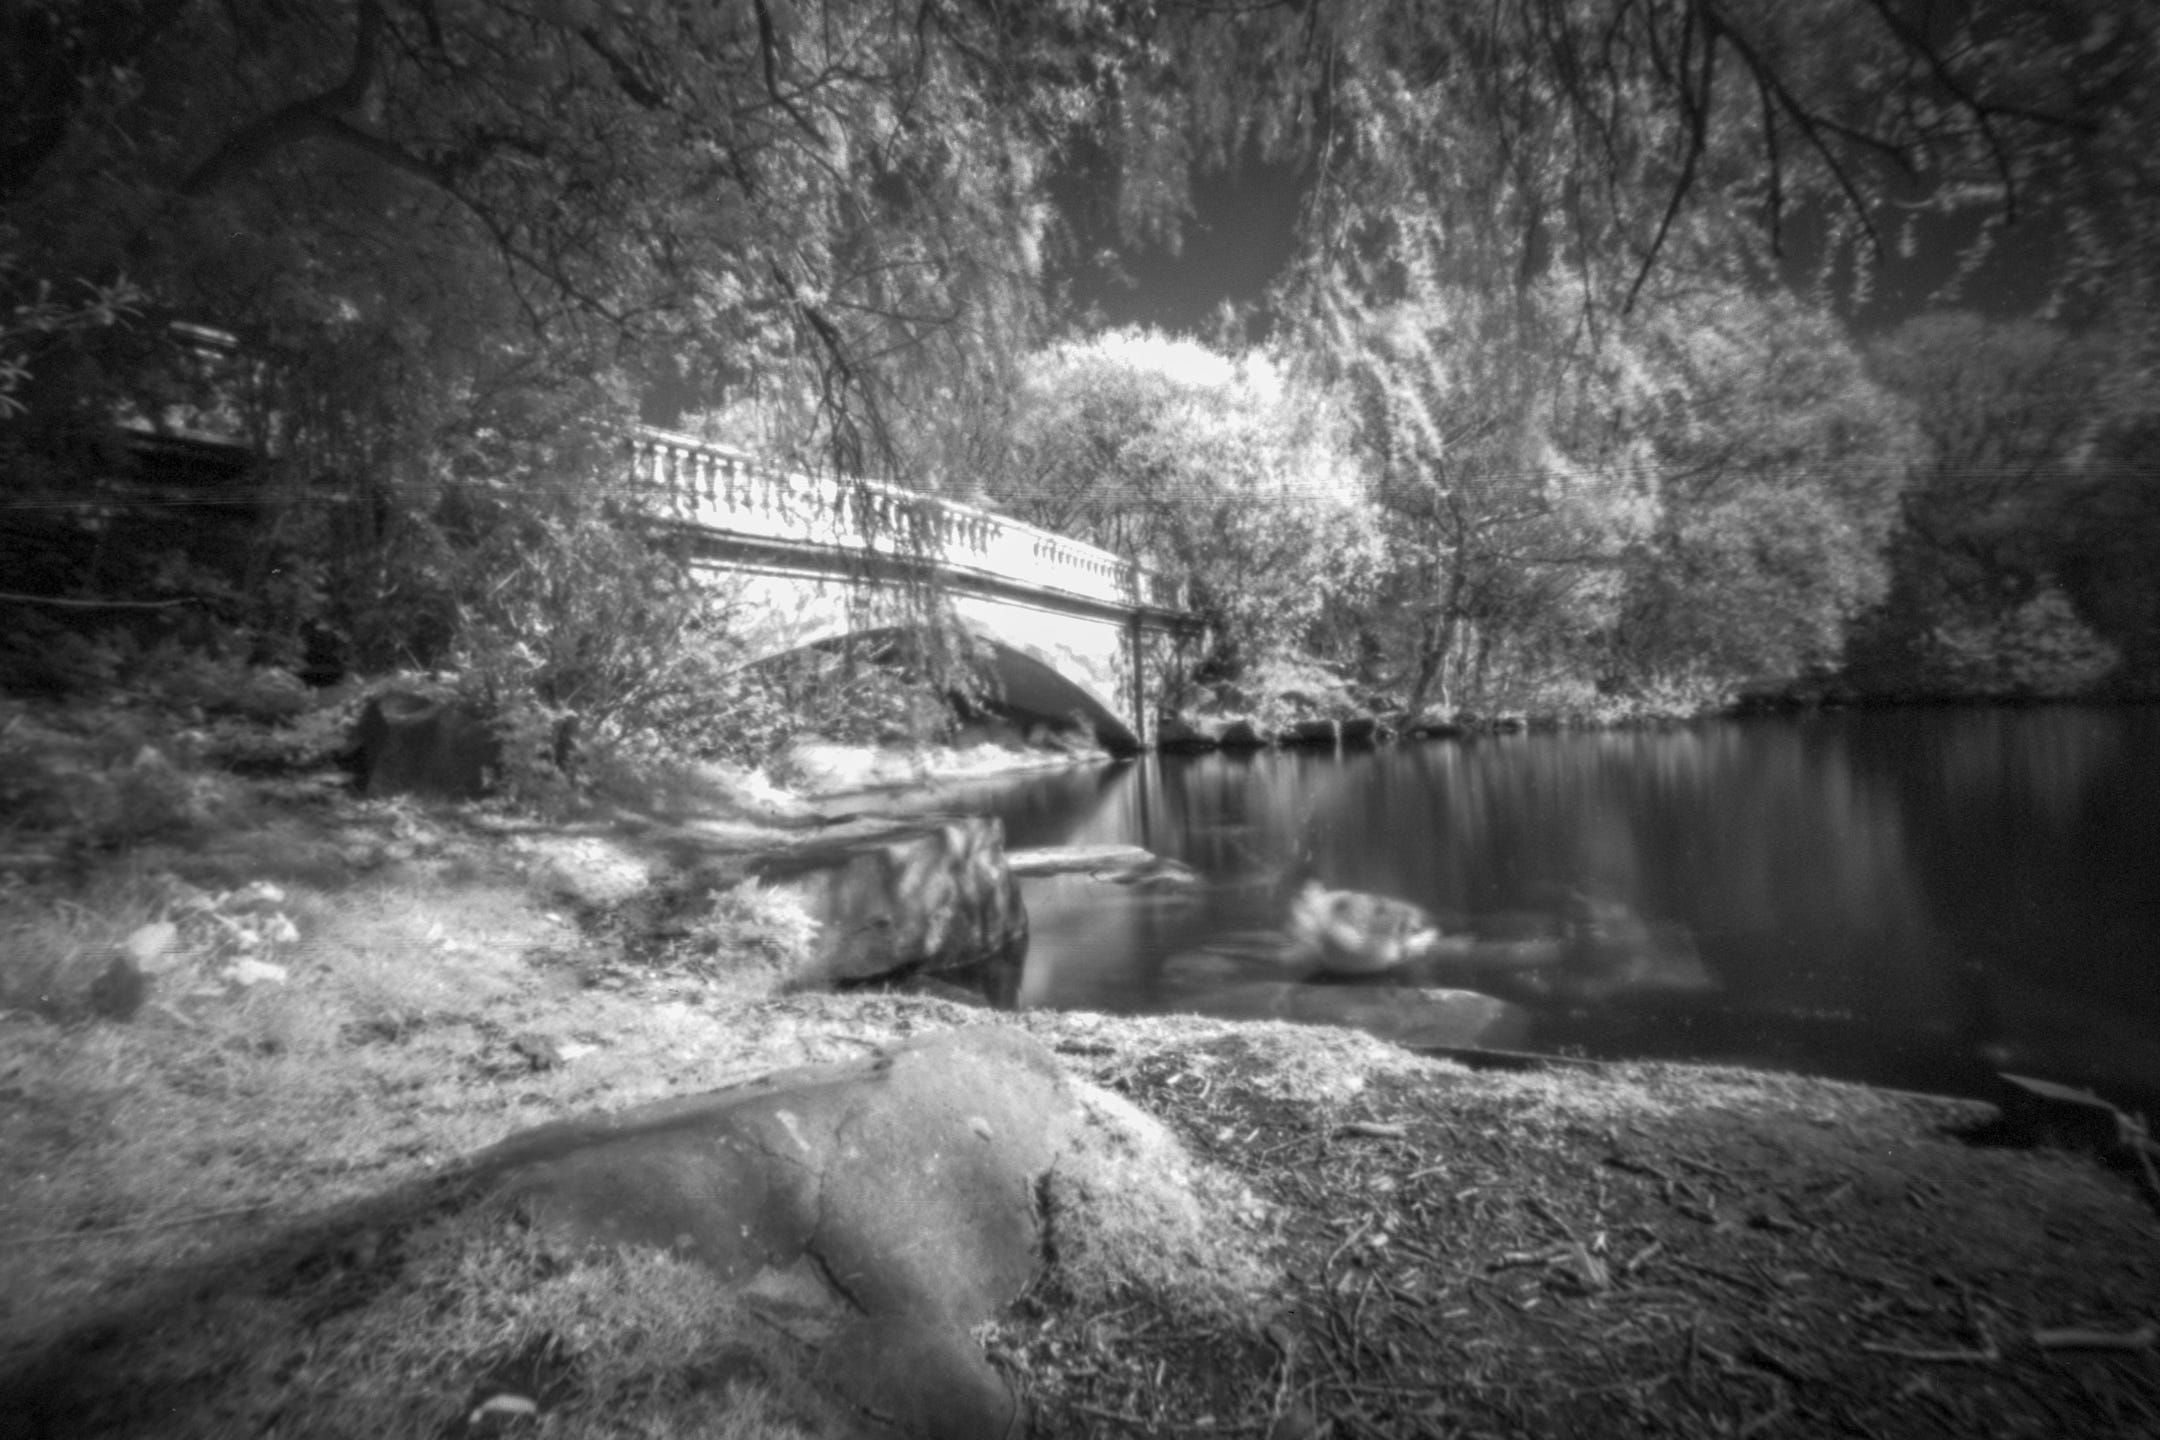
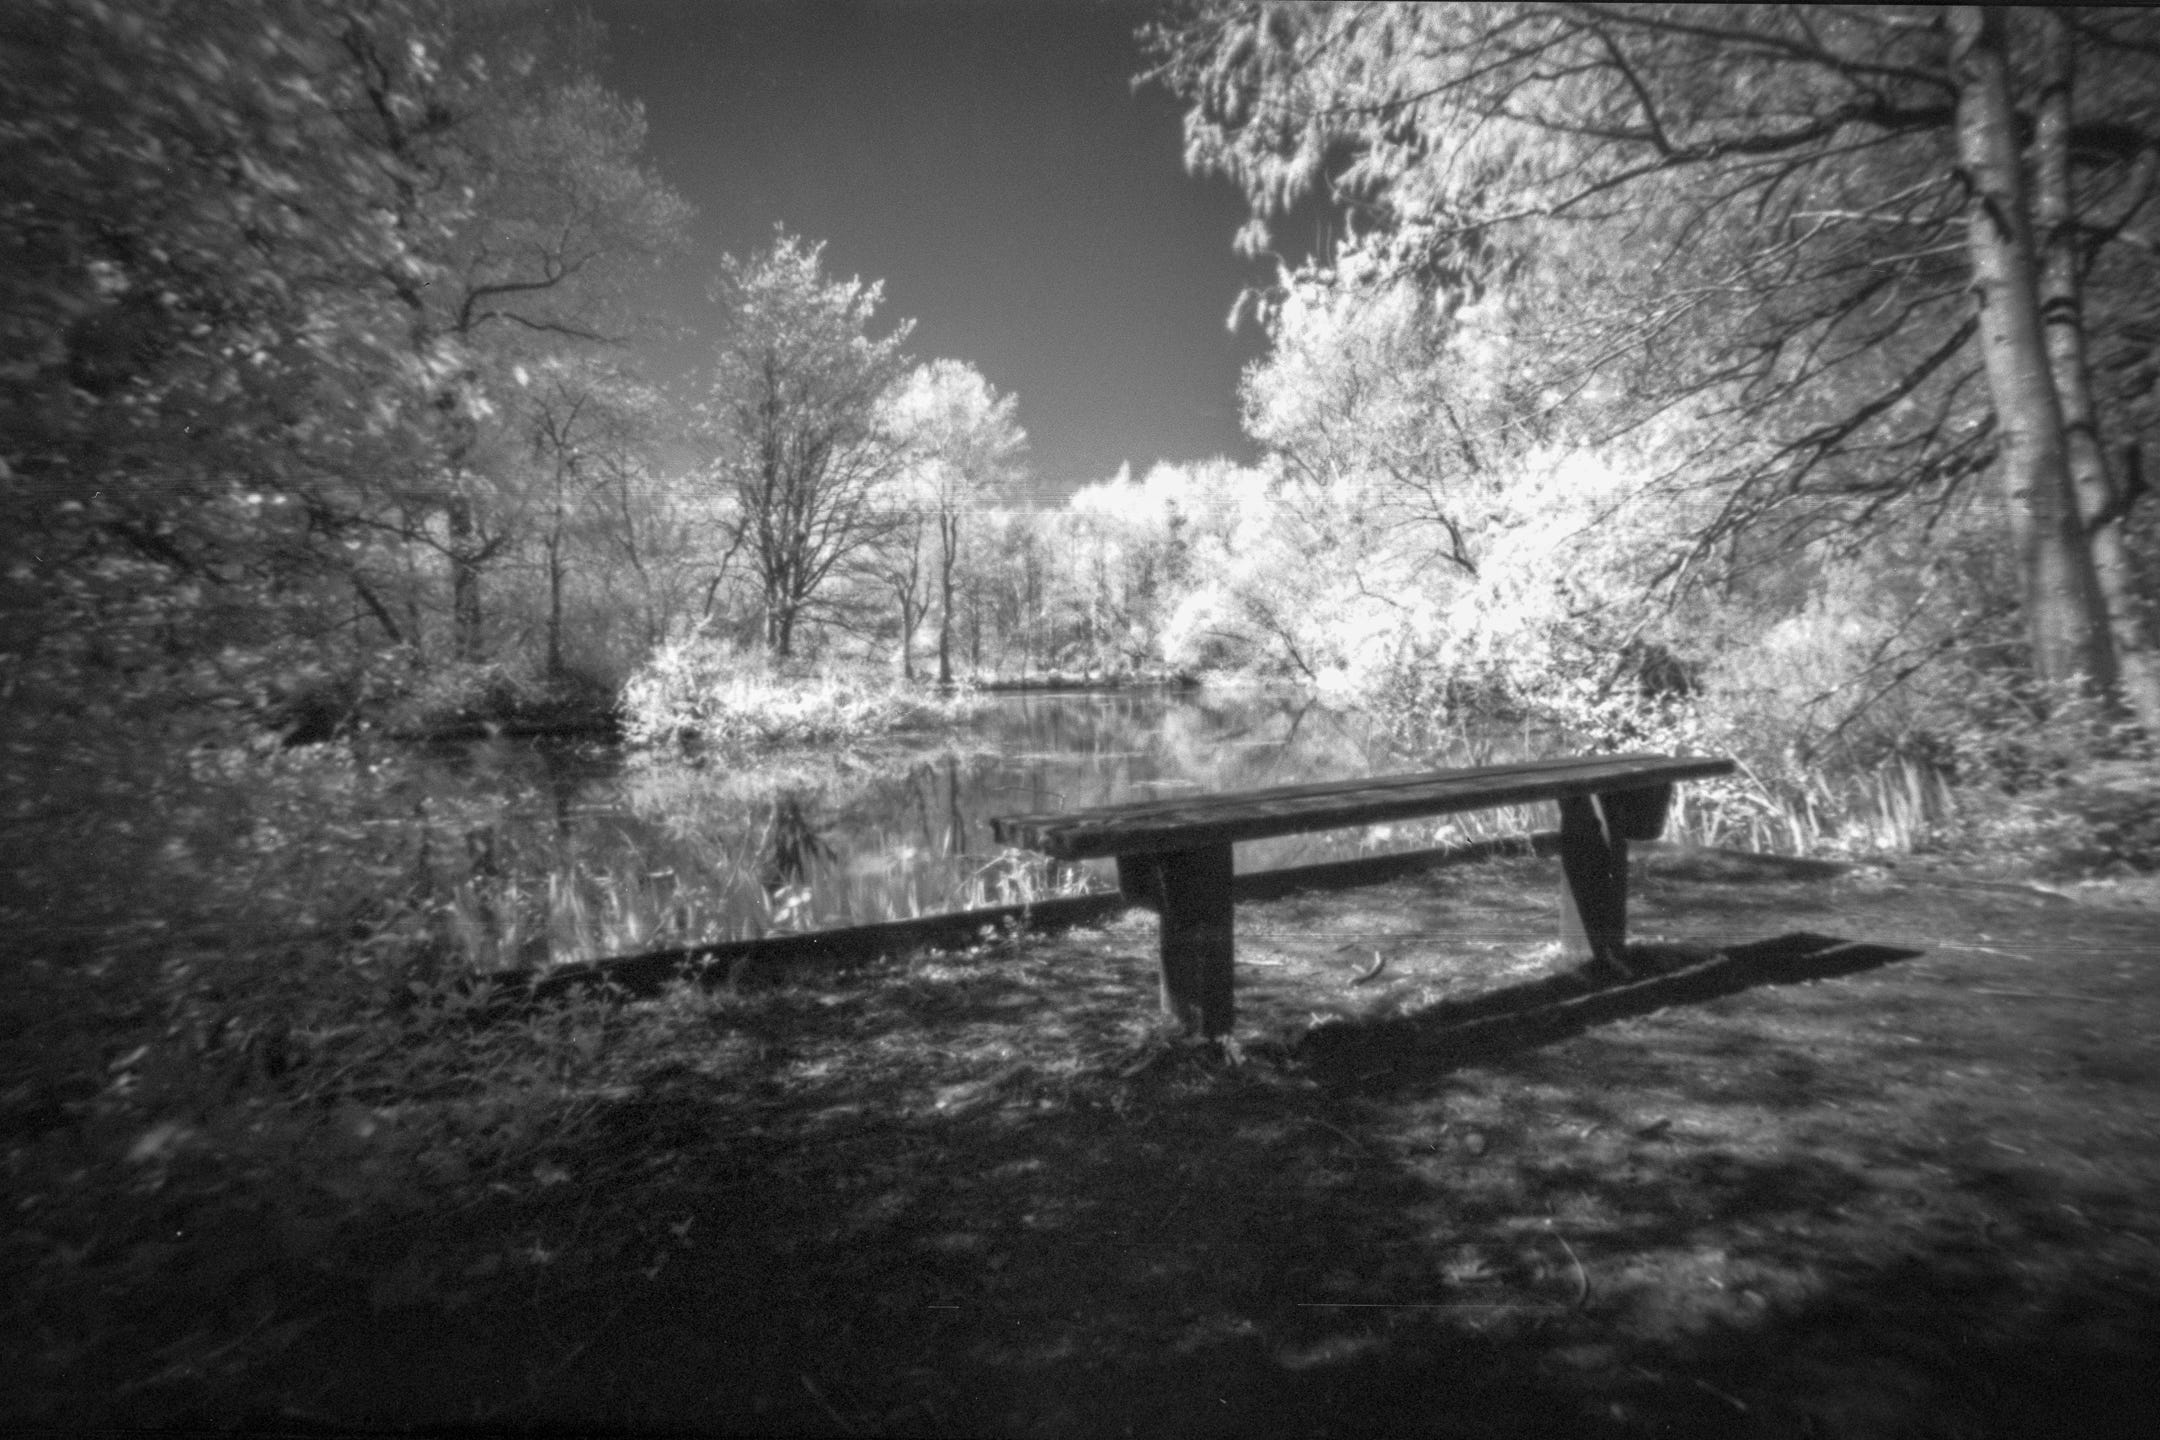
I have shot IR images with a variety of cameras over the years. Here are a couple more taken last year, again in the same local park, but using my Holga 120 WPC wide pinhole camera:
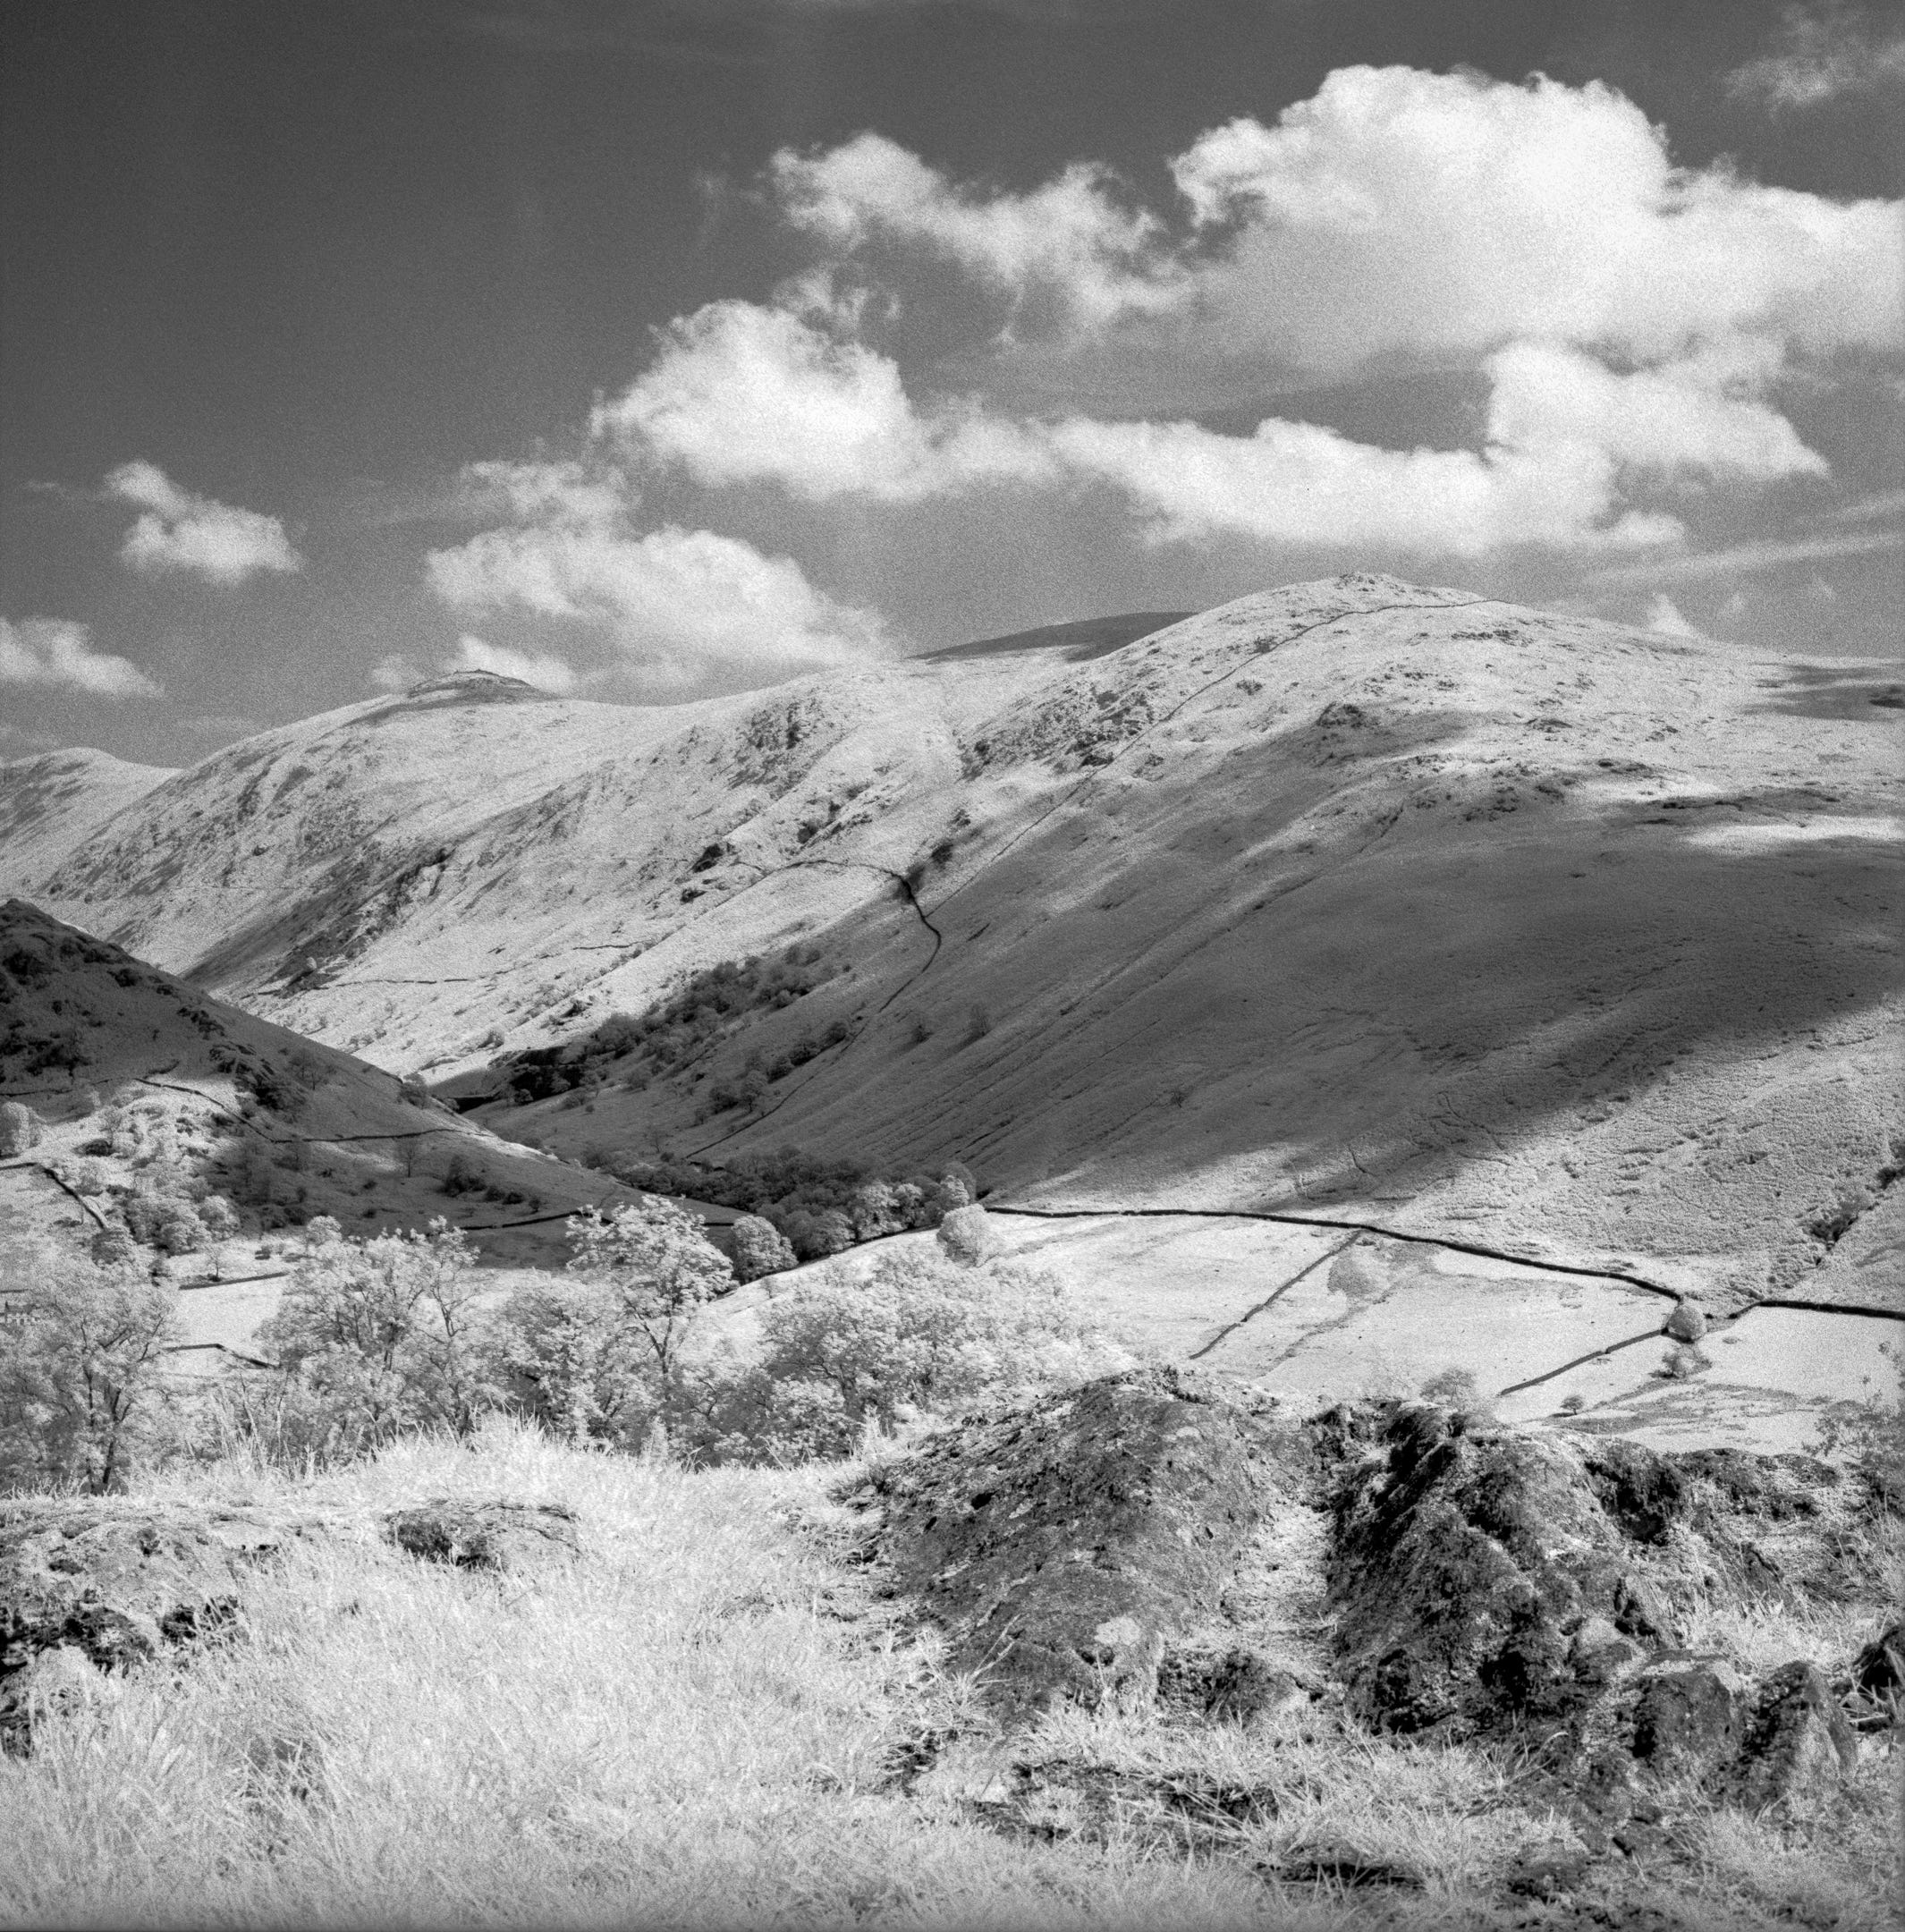
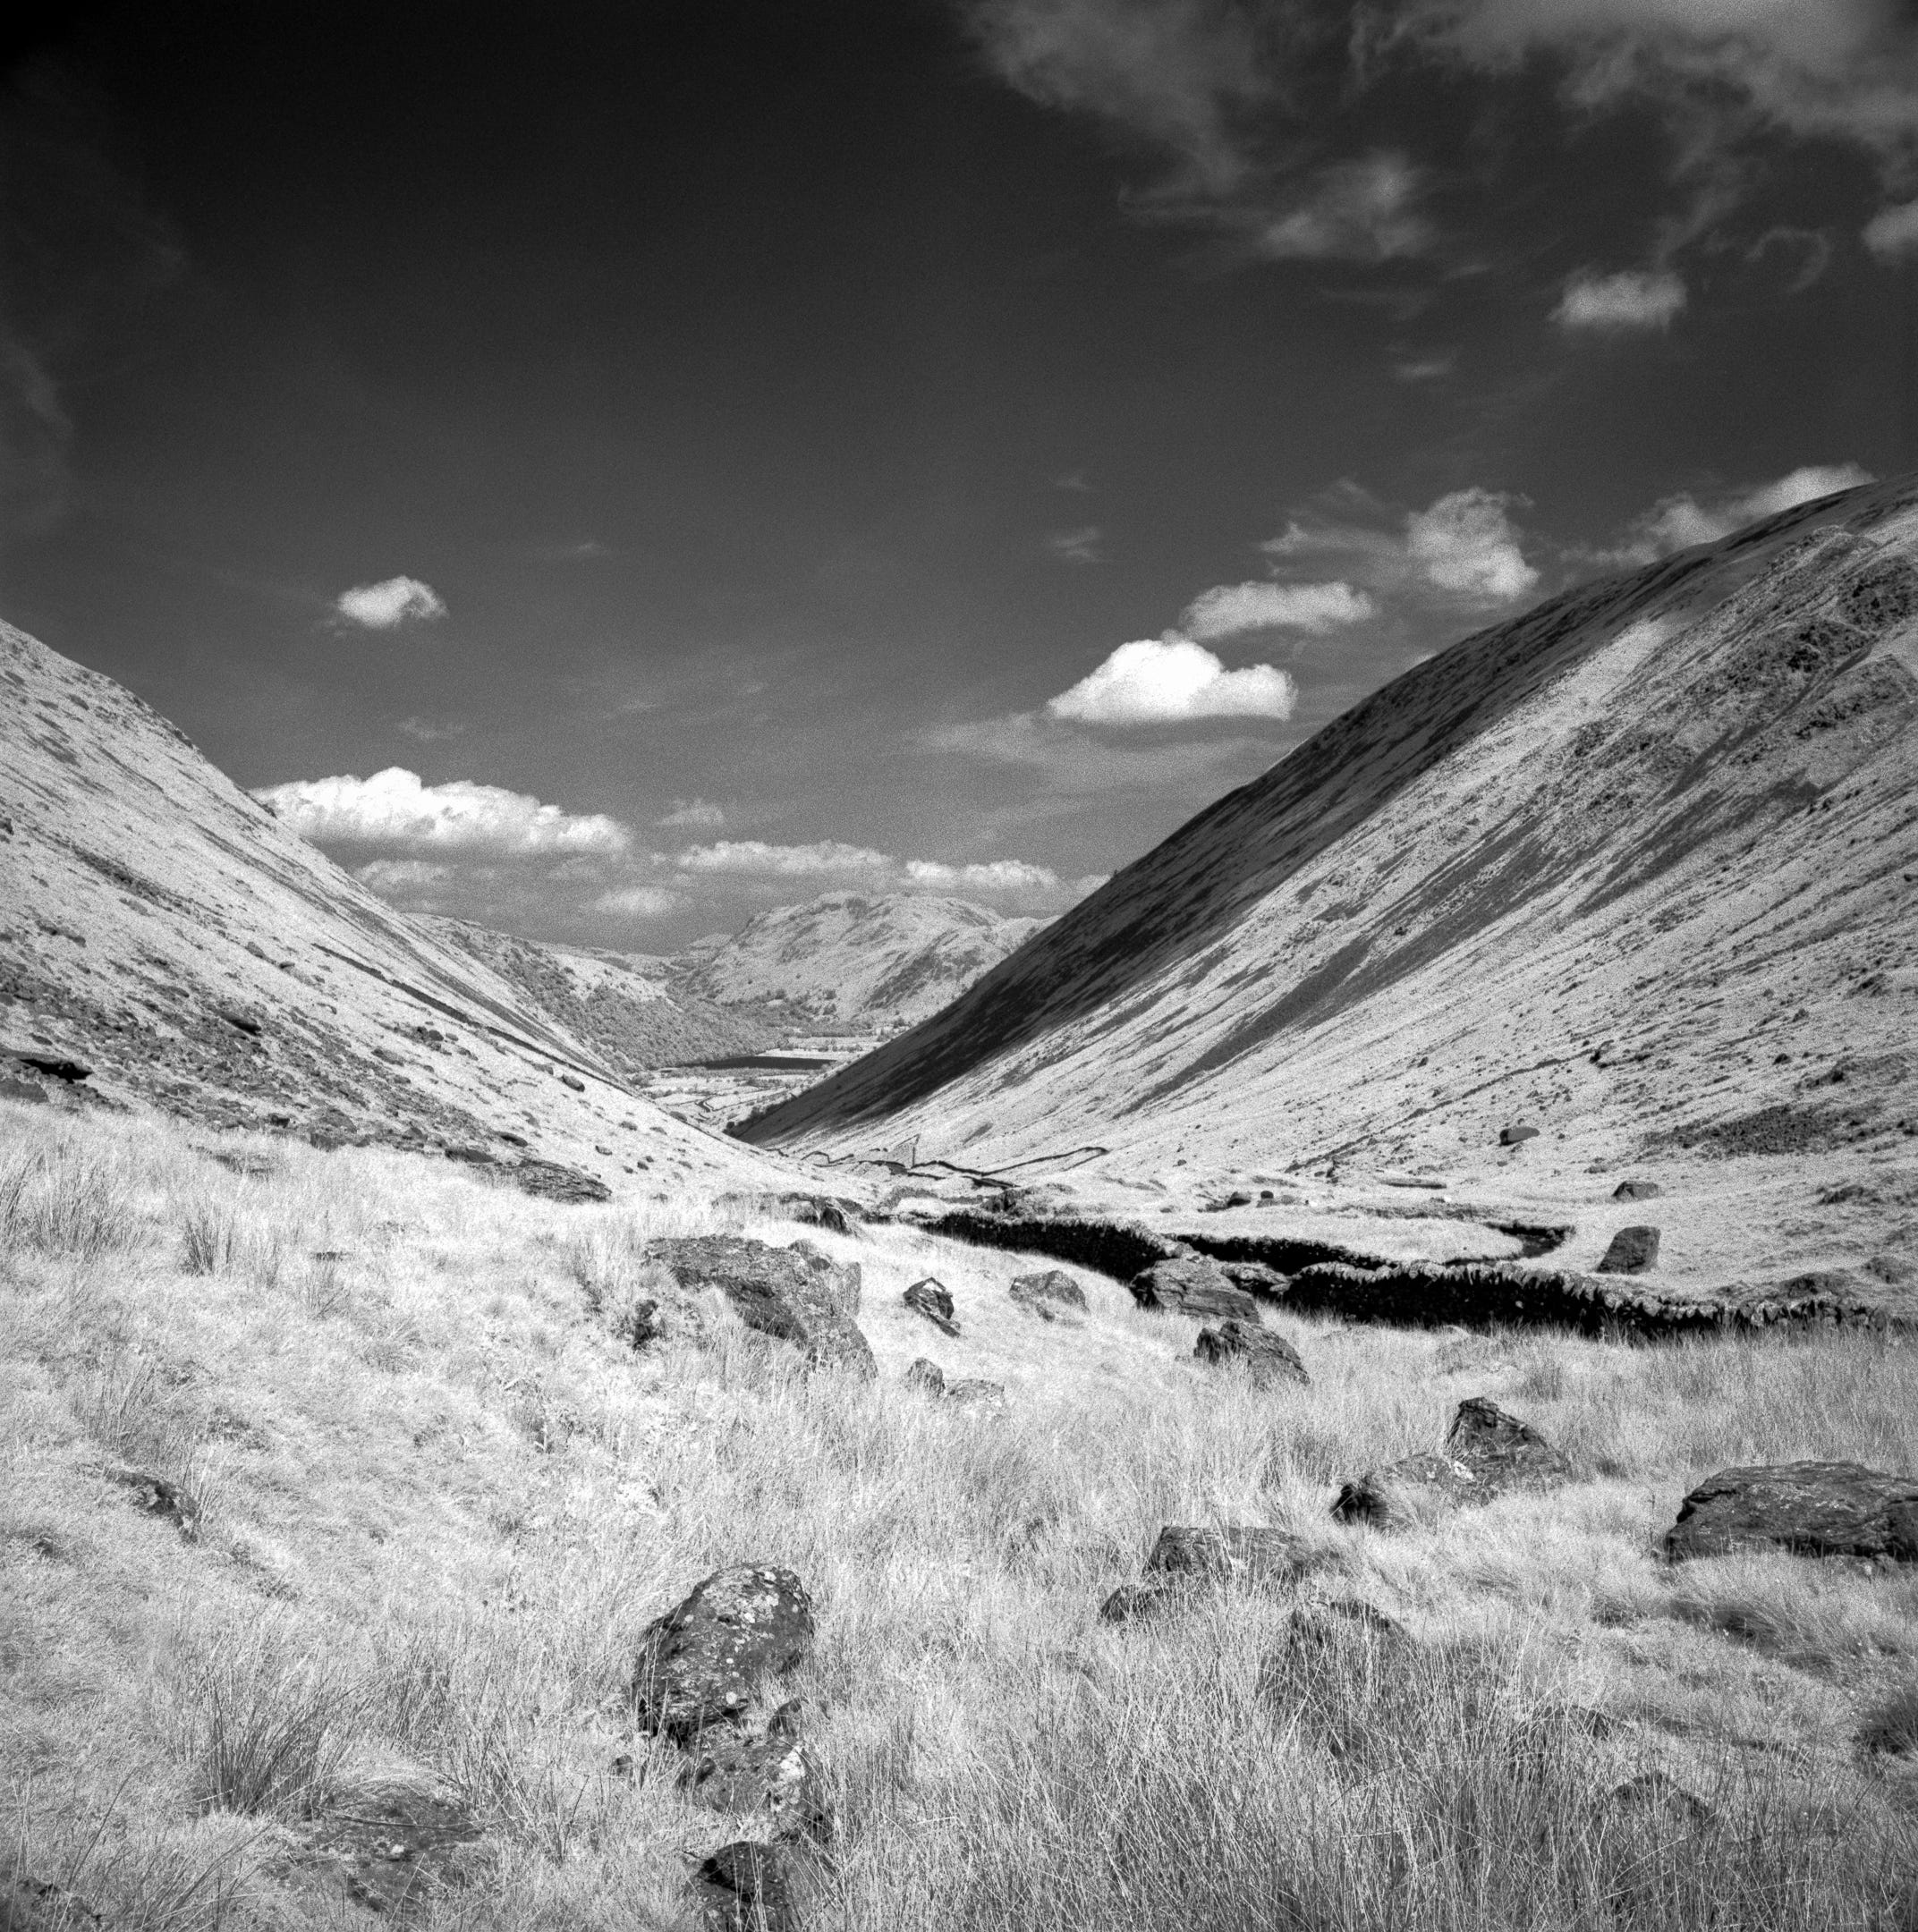
And finally, as a bonus, here are a couple of shots taken with a much higher-end setup, my trusty Hasselblad 501 CM. These were made a couple of years ago in The English Lake District, again with Rollei Infrared 400 and an R72 filter:
If you feel like trying out some “infrared” film, now is the perfect time to give it a go in the northern hemisphere.
I hope that you’ve enjoyed reading my ramblings. If so, please like, subscribe, restack or leave a comment.
Many thanks to those who have subscribed or interacted with my posts so far.
This blog will remain free for anyone to read.
Thanks for this, Mark.
I tried IR film a few times in the 70s and 80s but had little to no success. It was expensive so I “parked it”. A few years ago, I found a 720nm converted Fuji X-T20 in my favourite camera emporium, so I bought it. The next issue was “hotspots” with certain lenses. Thankfully, I soon got that worked out.
The benefit of the digital option is that shutter speeds and ISO are the same as non-IR - so you can shoot hand-held.
I do have a roll of SFX and an R72 filter, so I think I might use them this summer and compare with digital at the same shoot.
thanx to andrew sanderson i got to read this post and you got a new subscriber